
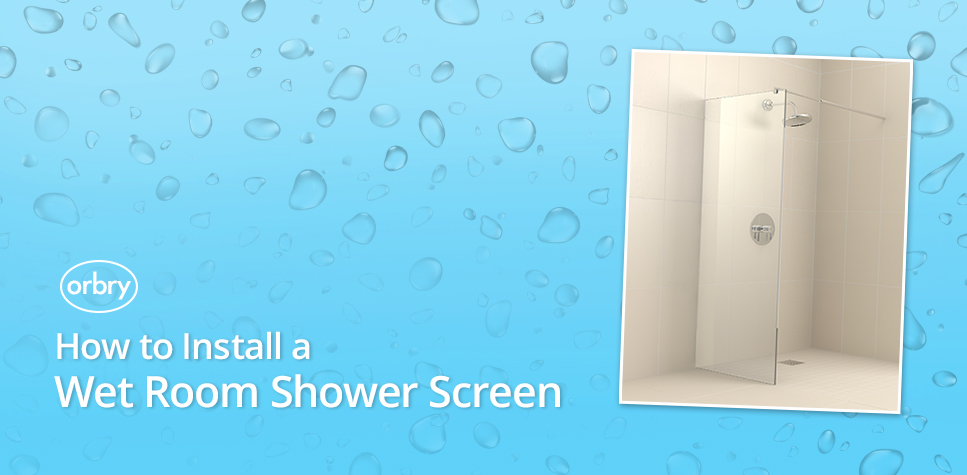
How to Install a Wet Room Shower Screen
Stylish Frameless Glass Shower Screens from Orbry Wet Rooms
A shower screen is an optional extra in a wet room, but it can become an essential – particularly in a busy family bathroom. Orbry shower screens are made from toughened 10mm thick glass, and have a modern frameless look. There are a range of sizes available from 690mm to 1190mm wide, as well a number of fixing channels and wall bars.
Benefits of Wet Room Shower Screen
- A wet room shower screen stops water from splashing throughout the room and aids drainage, this is particularly important in small shower rooms where towels or toilet paper might get wet.
- The simple design of Orbry shower screens makes them extremely easy to clean, and one side is coated with ClearShield® to help you keep it looking clean and clear.
- While the open plan nature of a wet room is often what draws us to them, it’s also good to be able to divide the space and create a clear showering area. As Orbry screens are clear frameless glass, they will not interrupt the look of the room.
- A hook can be added to the screen for storing showering products, or hanging towels & robes so that they stay dry but close at hand.
How to Install an Orbry Wet Room Shower Screen
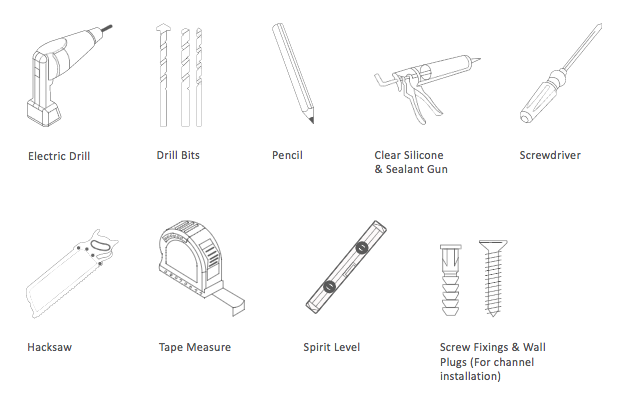
Firstly sketch out your design so you know where each part will go, particularly if you are using additional return panels and support bars. Make sure you have everything you need to install the shower screen ready.
Installing Shower Screen with Surface Channel
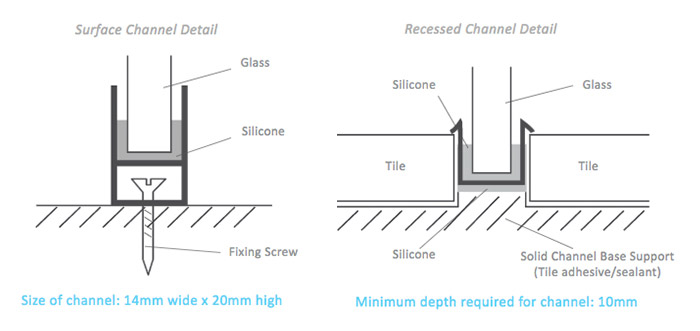
- Measure the width of the glass panel and cut the floor channel to size using a hacksaw. Place the wall and floor channels into position and mark through the pre-drilled holes with a pencil.
- Remove the channels to one side, then drill a hole at the marked positions using a 5.5mm drill bit and inset a red raw plug into each hole. Further holes can be drilled into the channel (and floor below) as necessary.
- Secure the surface floor channel into place with fixing screws.
Installing Shower Screen with Recessed Channel
- Measure the width of the glass panel and cut the floor channel to size using a hacksaw. Allow a gap of approximately 14mm whilst tiling for the Recessed Channel to sit within.
- Ensure that the underside of the Channel is properly supported. Run a bead of Silicone Sealant within the gap between the tiles then securely fix the Channel into place.
- Allow adequate time for the Silicone Sealant to cure before installing the glass.
For information on installing a range of shower screen configurations, see the full Orbry Shower Screen Installation Guide.
Optional Extras for Orbry Shower Screens
Extra parts are available to order with your screen to complete the look of your wet room, including joints for more than one panel, stylish wall bars and robe hooks.
- Return Panel; 290x2000mm or 390x2000mm
- Designer Wall Bar
- Designer Corner Bar
- 90° Joint
- 135° Joint
- T-Shaped Joint
- Double Robe Hook
- Recessed Channel
Order your Orbry Wet Room Shower Screen online today.